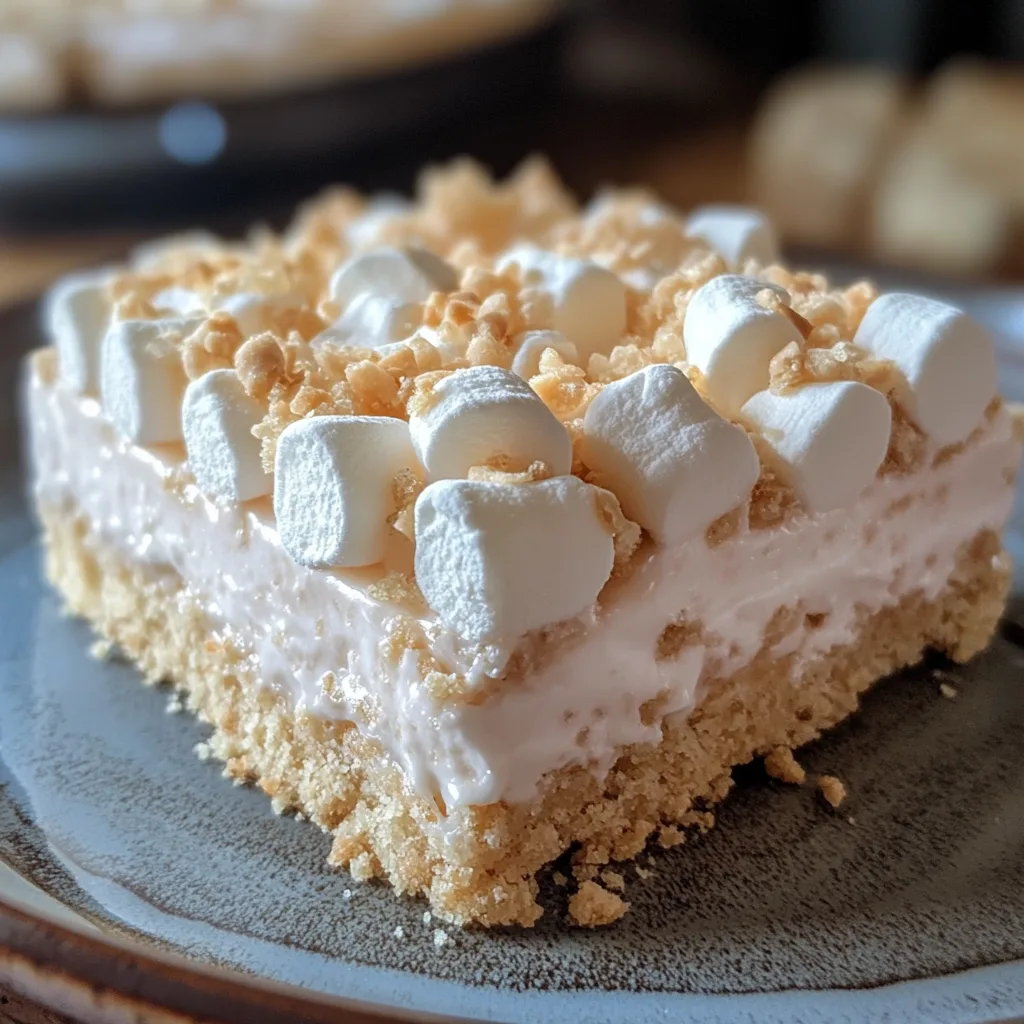
There’s something wonderfully nostalgic about a good No-Bake Marshmallow Slice. This delightful treat brings together the perfect balance of crunch and pillowy softness, creating a dessert that’s both comforting and impressive. Best of all, you won’t need to turn on your oven to create this crowd-pleaser!
Whether you’re looking for a quick dessert for unexpected guests or a fun weekend project with the kids, this marshmallow slice delivers on all fronts. The contrasting textures and sweet flavors make it impossible to stop at just one piece—consider yourself warned!
Why You’ll Love This
- No oven required – Perfect for hot summer days or when you don’t want to heat up the kitchen
- Quick prep time – Only takes about 15 minutes of active preparation
- Kid-friendly recipe – Little ones can help with almost every step
- Make-ahead friendly – Actually tastes better after setting in the refrigerator overnight
- Customizable – Easy to adapt with different cookies, mix-ins, or toppings

Ingredients
- 1½ cups crushed graham crackers, digestive biscuits, vanilla wafers, or shortbread cookies
- ½ cup unsalted butter, melted
- 8 oz cream cheese, softened
- ½ cup powdered sugar
- 1 teaspoon vanilla extract
- 1½ cups heavy whipping cream
- 2 cups mini rainbow marshmallows
- ½ cup white chocolate chips (optional)
Instructions
- Mix crushed graham crackers and melted butter. Press firmly into lined 8×8-inch dish. Chill 10 minutes.
- Beat cream cheese, powdered sugar, and vanilla until smooth. Separately whip heavy cream to stiff peaks.
- Fold whipped cream into cream cheese mixture. Then fold in marshmallows and optional white chocolate chips.
- Spread filling over chilled crust. Top with extra marshmallows for decoration.
- Cover and refrigerate at least 4 hours or overnight until firm. Cut into 12 squares.
Tips & Variations
- Cookie variations: Try using Oreos, shortbread, or ginger snaps instead of digestive biscuits for different flavor profiles.
- Add texture: Mix in 50g of chopped nuts, dried fruit, or chocolate chips with the marshmallows for extra dimension.
- Flavor boost: Add 1 teaspoon of vanilla extract or 1/2 teaspoon of peppermint extract to the biscuit mixture.
- Colorful twist: Use colored marshmallows for themed occasions or holidays.
- Cutting tip: For clean slices, dip your knife in hot water and wipe dry between cuts.
- Make-ahead: This slice can be prepared up to 3 days in advance and kept refrigerated.
Serving Suggestions
Serve these delicious slices with a scoop of vanilla ice cream for an indulgent dessert, or alongside a hot cup of coffee or tea for afternoon treats. They also make a wonderful addition to dessert platters at parties or potlucks.
For a special occasion, consider dusting the top with a little edible gold dust or serving with fresh berries on the side to cut through the sweetness.
Notes
- Store in an airtight container in the refrigerator for up to 5 days.
- Can be frozen for up to 3 months; thaw in the refrigerator overnight before serving.
- The slice is ready when the chocolate layer is completely set and no longer tacky to the touch.
- Allow to sit at room temperature for 10 minutes before serving for the best texture.
FAQs
Can I use large marshmallows instead of mini ones?
Yes, you can cut large marshmallows into quarters or use marshmallow fluff (about 1 cup) as an alternative.
My chocolate layer cracked when I cut the slice. How can I prevent this?
Let the slice come to room temperature for about 10 minutes before cutting, and use a hot knife to slice through the chocolate layer smoothly.
Can I make this recipe vegan?
Absolutely! Use vegan butter, vegan marshmallows, and dairy-free chocolate. Check that your biscuits are vegan-friendly too.
Why did my base turn out crumbly?
The base might be too crumbly if there’s not enough butter to bind the crumbs. Make sure to press it firmly into the tin and allow sufficient chilling time before adding the marshmallows.
[recipe_card]


