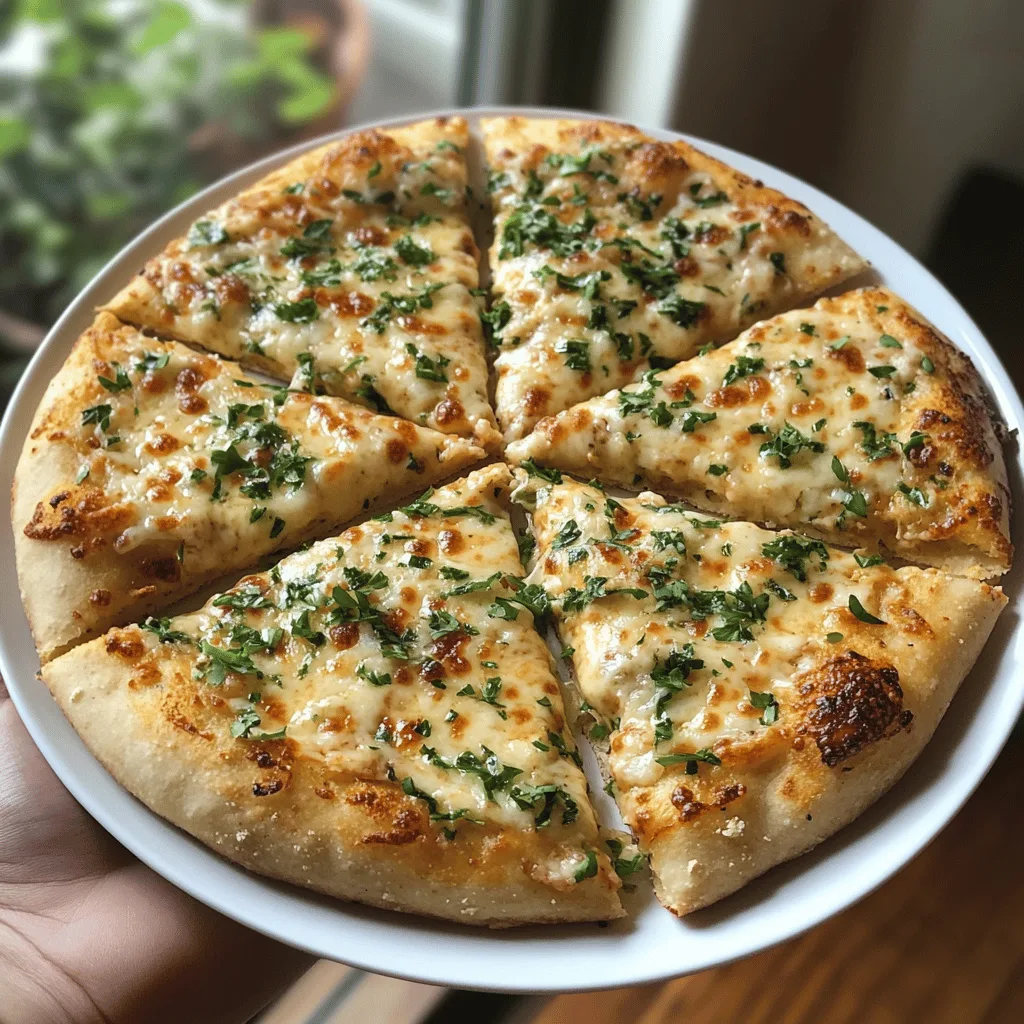
There’s something undeniably comforting about homemade pizza, but when it’s packed with protein and loaded with garlicky, cheesy goodness, it becomes something truly special. This High Protein Cheesy Garlic Pizza transforms the classic comfort food into a more nutritious option without sacrificing any of the indulgent flavors we all crave.
Perfect for fitness enthusiasts, families looking for healthier dinner options, or anyone who simply loves a good pizza, this recipe delivers on both taste and nutrition. The protein-enriched dough creates a satisfying base that will keep you fuller longer, while the aromatic garlic and melty cheese topping provides that pizza experience we all love.
Why You’ll Love This
- Protein-packed dough keeps you satisfied longer than traditional pizza
- Ready in just 45 minutes from start to finish
- Uses simple ingredients you likely already have in your pantry
- Customizable with your favorite toppings while keeping the protein base
- Perfect for meal prep – leftovers reheat beautifully for lunch the next day
Ingredients
- 70g all-purpose flour (or 00 flour or self-rising flour)
- 1 teaspoon baking powder (omit if using self-rising flour)
- 1/8 teaspoon salt
- 70g plain Greek yogurt (high protein variety recommended)
- 5g light butter
- 1-2 garlic cloves, minced (or 1 teaspoon pre-minced garlic)
- 1/2 teaspoon mixed herbs (Italian seasoning blend)
- Pinch of salt
- 50g light shredded cheese (mozzarella or a light cheese blend)
- 10g Parmigiano Reggiano, freshly grated
- Dried basil or parsley for sprinkling
Instructions
- Start by preheating your oven to 200°C (390°F). If you have a pizza stone, place it in the oven now to heat up. Otherwise, a regular baking sheet works fine – just flip it upside down so you have a flat surface for easier pizza transfer.
- In a medium bowl, whisk together the flour, baking powder (if using), and salt. Add the Greek yogurt and mix until the ingredients begin to come together. Then use your hands to knead the mixture directly in the bowl until it forms a cohesive ball of dough, about 1-2 minutes. The dough should be slightly tacky but not overly sticky.
- Cover the dough with a clean kitchen towel or plastic wrap and let it rest for 5 minutes. This brief resting period makes the dough easier to work with and helps develop a better texture in the final crust.
- While the dough is resting, prepare the garlic butter topping. In a small bowl, combine the light butter, minced garlic (or garlic powder), mixed herbs, and a pinch of salt. Mix well until everything is evenly incorporated. If using solid butter, you may need to soften it slightly to make mixing easier.
- On a lightly floured surface, roll out the dough into your desired shape and thickness. For a crispy crust, aim for about 1/4 inch thickness. You can use a rolling pin or simply press and stretch the dough with your hands. If the dough springs back too much, let it rest for another minute before continuing.
- Transfer the rolled dough to a piece of parchment paper or a lightly floured pizza peel if you have one. Spread the garlic butter mixture evenly over the surface of the dough, going almost to the edges. Sprinkle the light shredded cheese evenly over the top, followed by the grated Parmigiano Reggiano.
- Carefully transfer the pizza (with the parchment paper if using) onto the preheated baking sheet or pizza stone in the oven. Bake for 8-10 minutes, or until the crust is golden brown and the cheese is melted and starting to bubble with some golden spots.
- Remove the pizza from the oven and let it cool for just a minute. If desired, sprinkle with dried basil or parsley for added color and flavor. Cut into 8 slices and serve immediately while hot and cheese is still gooey.
Tips & Variations
- For extra protein, add grilled chicken, turkey pepperoni, or crumbled tofu before baking
- Try different protein powders – unflavored whey, pea protein, or a blend all work well
- Make individual pizzas for customized toppings that suit everyone’s preferences
- Substitute whole wheat flour for half of the all-purpose flour for added fiber
- For a dairy-free version, use plant-based cheese alternatives and olive oil instead of butter
- Prepare the dough ahead of time and refrigerate for up to 24 hours for deeper flavor development
Serving Suggestions
This protein-packed pizza pairs beautifully with a simple arugula salad dressed with lemon juice and olive oil to cut through the richness of the cheese. The peppery greens complement the garlicky flavors perfectly.
For a complete meal, serve alongside roasted vegetables like bell peppers, zucchini, or broccoli. If you’re serving this for a casual gathering, consider offering a side of marinara sauce for dipping those delicious crusts.
Notes
- Store leftovers in an airtight container in the refrigerator for up to 3 days
- Reheat in a 350°F oven for 5-7 minutes to restore crispiness (avoid microwave if possible)
- The dough should feel slightly tacky but not sticky – add a tablespoon of flour at a time if too wet
- Pizza is done when the bottom crust is golden brown and cheese is bubbly with some browned spots
FAQs
Can I freeze this pizza dough?
Yes! After kneading, divide the dough into portions, wrap tightly in plastic wrap, and freeze for up to 3 months. Thaw overnight in the refrigerator before using.
What type of protein powder works best?
Unflavored whey protein works great, but pea protein or other plant-based options also work well. Avoid sweetened or flavored varieties for this recipe.
Can I make this gluten-free?
Yes, substitute the all-purpose flour with a 1:1 gluten-free flour blend. The texture may be slightly different, but it will still be delicious.
How can I make the crust crispier?
For a crispier crust, preheat a pizza stone for at least 30 minutes before baking, or bake the pizza on the lowest rack of your oven. You can also brush the crust with olive oil before baking.
[recipe_card]