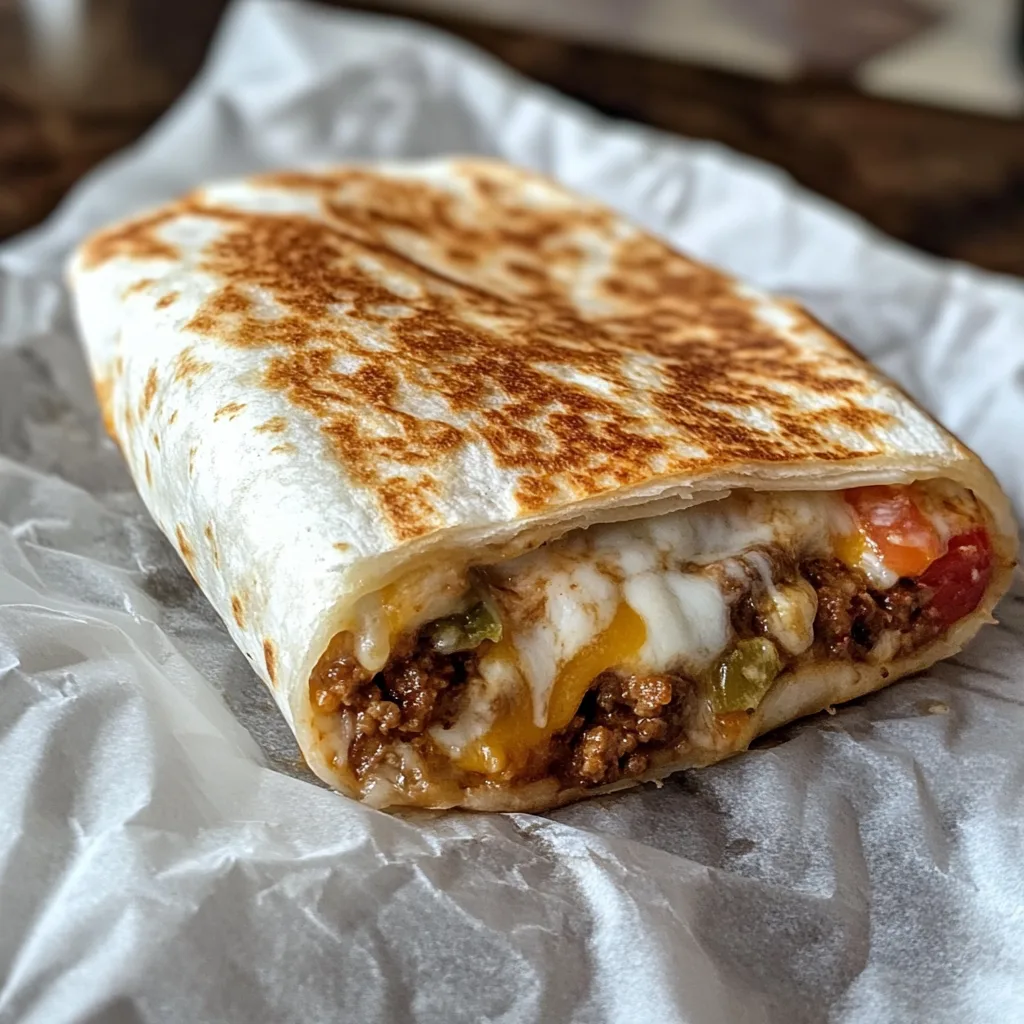
The Grilled Cheese Burrito is what happens when two comfort food classics collide in the most delicious way possible. This mouthwatering creation wraps all the gooey goodness of a grilled cheese sandwich inside a warm tortilla, then gets toasted to crispy, golden perfection. It’s the ultimate handheld meal that brings together the best of both worlds.
I first created this recipe on a rainy Sunday when my family was craving something cheesy and satisfying, but with a twist. The result was an instant hit that’s now in our regular rotation. The contrast between the crispy exterior and the melty, cheesy interior makes this a truly crave-worthy meal that both kids and adults will devour.
Why You’ll Love This
- Perfect fusion of two beloved comfort foods: grilled cheese and burritos
- Customizable with your favorite cheese varieties and add-ins
- Kid-friendly but sophisticated enough for adults
- Makes a complete meal in one handheld package
- Leftovers reheat beautifully for lunch the next day
Ingredients
- 1 pound ground beef
- 1 tablespoon olive oil
- 1 onion, diced
- 1 teaspoon salt
- 1 teaspoon black pepper
- 1 teaspoon smoked paprika
- 1 teaspoon dried oregano
- 1/2 cup tomato sauce
- 4 large flour tortillas
- 3 tablespoons spicy mayo
- 1 cup fried rice
- 1 cup nacho cheese sauce
- 1 cup sour cream
- 1 cup tortilla chips
Instructions
- Sauté onion until soft. Add beef and seasonings, cook until browned. Add sauce and simmer 5 minutes.
- Layer spicy mayo, rice, cheese sauce, sour cream, chips, and beef on tortillas.
- Fold sides and roll tightly from bottom to secure filling.
- Optional: sprinkle cheese on griddle, place burrito seam-down. Grill 2-3 minutes per side.
- Serve hot with extra spicy mayo for dipping.
Tips & Variations
- For a breakfast version, swap the ground beef for scrambled eggs and add crispy bacon bits
- Make it vegetarian by omitting the beef and adding sautéed bell peppers and onions
- Try different cheese combinations like pepper jack, Monterey jack, or mozzarella
- For extra crispiness, brush the outside of the tortilla with butter before grilling
- Prepare the fillings in advance for a quick assembly when you’re ready to cook
- For a spicy kick, add pickled jalapeños or chipotle peppers in adobo sauce
Serving Suggestions
Serve these Grilled Cheese Burritos with small bowls of salsa, guacamole, and extra sour cream for dipping. A simple side salad with a lime vinaigrette makes a perfect accompaniment to balance the richness of the burritos.
For a more substantial meal, pair with Mexican street corn (elote) or a cup of tortilla soup. If serving for a casual gathering, cut the burritos into smaller pieces and arrange on a platter with toothpicks for easy appetizers.
Notes
- Store any leftover burritos wrapped in foil in the refrigerator for up to 2 days.
- Reheat in a 350°F oven for 10-15 minutes or in a skillet over medium-low heat until warmed through.
- The burrito is done when the cheese is completely melted and the tortilla is golden brown and crispy.
- If the burrito is browning too quickly before the cheese melts, lower the heat and cover the skillet for 1-2 minutes.
FAQs
Can I make these ahead of time?
Yes! You can assemble the burritos up to a day in advance and store them wrapped in plastic in the refrigerator. Just grill them when you’re ready to eat.
Can I freeze these burritos?
Absolutely. Wrap each ungrilled burrito tightly in foil, place in a freezer bag, and freeze for up to 3 months. Thaw in the refrigerator overnight before grilling.
What’s the best cheese to use?
A combination of American cheese (for meltability) and cheddar (for flavor) works best, but feel free to experiment with your favorites.
How do I prevent the burrito from falling apart while grilling?
Make sure to fold in the sides first before rolling, and don’t overfill. Starting with the seam side down when grilling helps seal it shut.
[recipe_card]