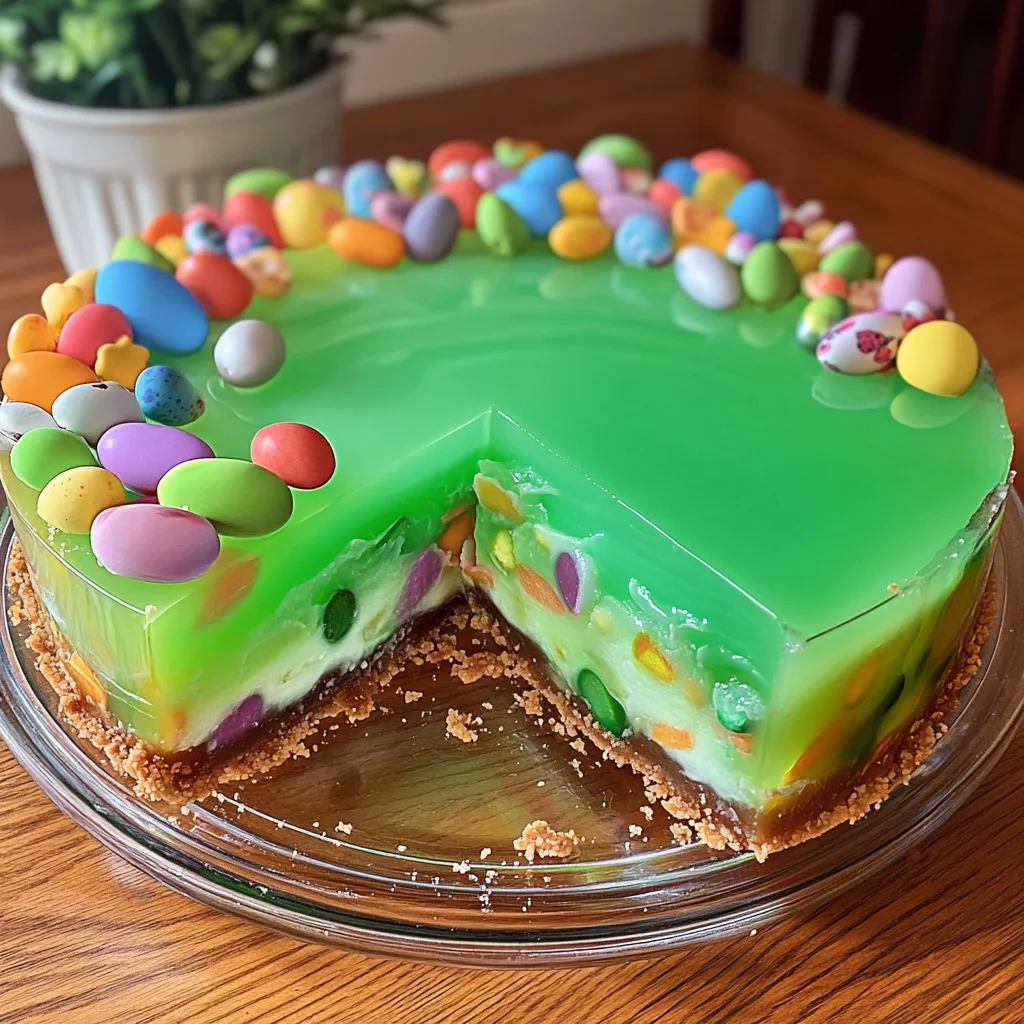
Easter is a time for colorful celebrations and delightful treats that bring the whole family together. This Easter Jell-O Pie captures the spirit of spring with its vibrant layers and light, refreshing taste. It’s the perfect dessert to brighten your holiday table!
What makes this pie special is its beautiful pastel layers that remind us of Easter eggs and spring flowers. The creamy, cool texture provides a welcome contrast to traditional heavy holiday meals, making it an ideal finale to your Easter feast.
Why You’ll Love This
- No baking required – perfect for busy holiday preparations
- Customizable colors to match your Easter decor
- Make-ahead friendly – prepare a day before your celebration
- Kid-friendly recipe that little ones will enjoy helping create
- Light and refreshing alternative to rich Easter chocolates
Ingredients
- ½ package Pink Starburst Jell-O (a little under 2 ounces)
- 1½ ounces Blue Jell-O (½ Package)
- 1½ ounces Yellow Jell-O (½ Package)
- 1½ ounces Purple Jell-O (½ Package)
- 16 ounces Whipped Cream, divided
- 3 cups Boiling Water
- 1⅓ cup Cold Water, divided
- Yellow Food Dye (optional)
- Pink Food Dye (optional)
- 2½ cups Graham Cracker Crumbs
- 12 tbsp Butter (1 ½ sticks)
Instructions
- Melt your butter in the microwave until it’s fully liquified. Combine the graham cracker crumbs and melted butter in a medium bowl and mix until a thick, sand texture occurs. Place the mixture in your springform pan and spread it across the bottom and up the sides, pressing it down so it packs in. Place the crust in the freezer until you’re ready to add layers.
- Place each color of Jell-O powder in its own small bowl. Place ¾ cup boiling water in each bowl and stir until no graininess remains on the bottom of the bowl. Place ⅓ cup cold water in each bowl and stir once more. Place the bowls of Jell-O in the fridge for about 20-30 minutes. You don’t want it to be solidified, just thickened.
- Add 4 ounces of whipped cream to each Jell-O bowl and vigorously mix until fully combined. This may take a minute or two, per bowl. If you’re using food dye to add more color to the yellow and pink, add that at this point and turn until no color streaks appear and you’ve reached your desired shades of color.
- Place the first color (I used yellow, but you can do your own color order) in the crust and spread even. Place the pie back in the freezer for 5 minutes, then add the next color, then back in the freezer for 5 minutes. Repeat this process until all 4 colors have been added.
- Leave the pie in the freezer for 3-4 hours or until completely solidified all the way through. Top with whipped cream, if desired, and enjoy!
Tips & Variations
- For more vibrant Easter colors, try purple grape, pink strawberry, and yellow pineapple Jell-O flavors
- Add food coloring to vanilla or lemon Jell-O for custom pastel shades
- Sprinkle the top with colorful Easter sprinkles or mini chocolate eggs for decoration
- For a lighter version, use sugar-free Jell-O and light cream cheese
- Create more layers by dividing the Jell-O mixtures further and using additional colors
- Add 1/2 cup of fresh berries between layers for extra texture and flavor
Serving Suggestions
Serve this Easter Jell-O Pie chilled with a dollop of extra whipped cream on the side. It pairs wonderfully with fresh berries or a light fruit salad to complete your Easter dessert spread.
For a special touch, serve alongside pastel-colored macarons or Easter cookies to create a festive dessert table that will delight guests of all ages.
Notes
- Store covered in the refrigerator for up to 3 days
- The pie is ready when it feels firm to the touch with no liquid jiggle
- Allow 10-15 minutes at room temperature before slicing for cleaner cuts
- For best results, use a sharp knife dipped in hot water to slice
FAQs
Can I make this pie without a pre-made crust?
Absolutely! You can make your own graham cracker crust by combining 1½ cups graham cracker crumbs with 1/3 cup melted butter and 3 tablespoons sugar, then pressing into a pie dish.
Can I freeze this Jell-O pie?
Freezing isn’t recommended as Jell-O’s texture changes when frozen and thawed. This pie is best enjoyed fresh from the refrigerator.
How far in advance can I make this pie?
You can prepare this pie up to 24 hours before serving. Add any decorative toppings just before serving for the best appearance.
Can I use sugar-free Jell-O and light cream cheese?
Yes! This recipe works well with sugar-free Jell-O and light cream cheese for a lower-calorie option.
[recipe_card]