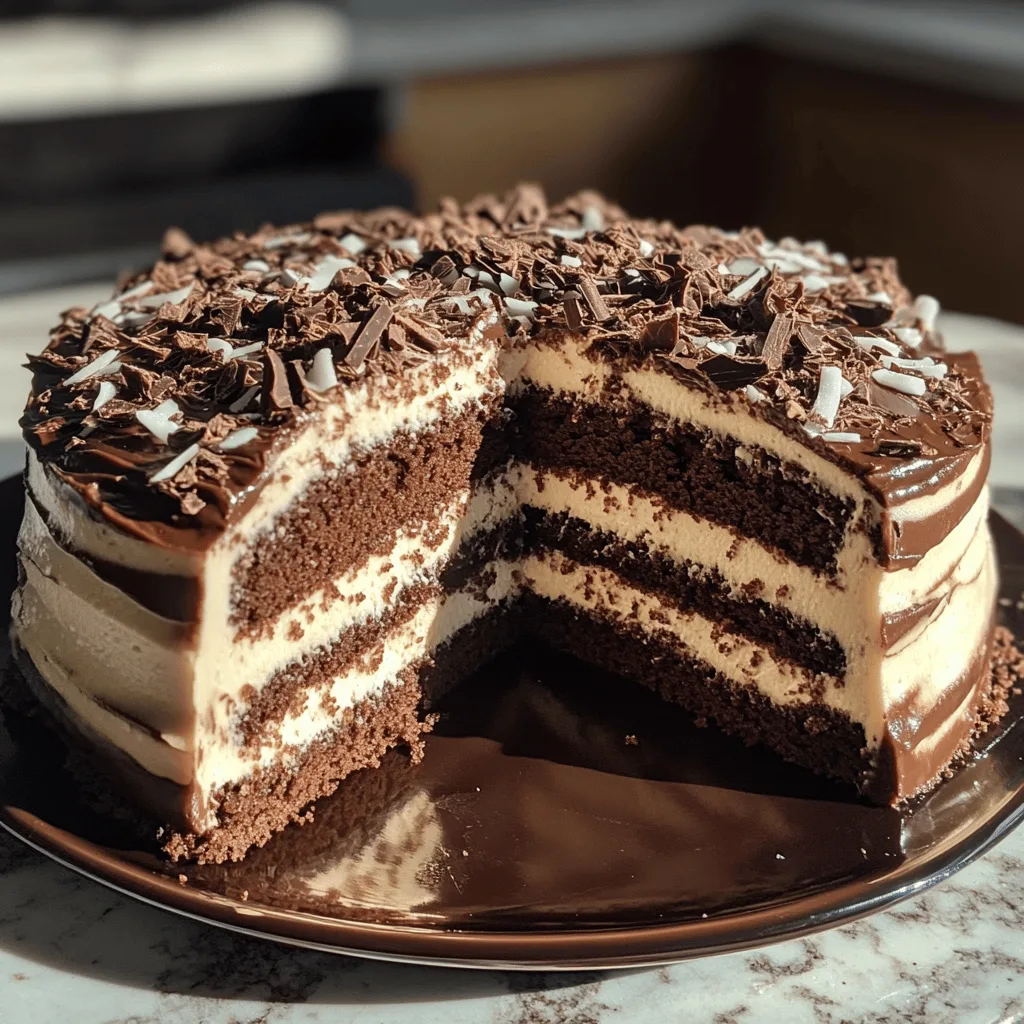
Welcome to a slice of tropical paradise in cake form! The Choco Coconut Dream Cake combines rich chocolate decadence with the exotic flavor of coconut, creating a dessert that’s both indulgent and refreshingly different. This cake has become my go-to recipe when I want to impress guests without spending hours in the kitchen.
What makes this cake special is the perfect balance between the deep chocolate layers and the light, aromatic coconut cream. Each bite takes you on a journey from rich cocoa depths to tropical sweetness, making it impossible to stop at just one slice!
Why You’ll Love This
- Simple ingredients that you likely already have in your pantry
- Perfect texture contrast between moist cake and creamy coconut layers
- Can be made ahead of time and actually improves overnight
- Impressive enough for special occasions but easy enough for weeknight cravings
- Naturally brings together chocolate lovers and coconut enthusiasts at the same table
Ingredients
- 1 box chocolate cake mix (approximately 15.25 oz)
- 3 large eggs
- 1/2 cup vegetable oil
- 1 cup water
- 1 cup sweetened condensed milk (about 14 oz can)
- 1 1/2 cups sweetened shredded coconut
- 1/2 cup powdered sugar
- 1 cup heavy cream
- 1 1/2 cups semisweet chocolate chips (about 9 oz)
- 1 teaspoon vanilla extract
- Additional shredded coconut for sprinkling on top
- Chocolate shavings or curls
Instructions
- Preheat your oven to 350°F (175°C). Lightly grease a 9×13-inch baking dish with cooking spray or butter, or line it with parchment paper for easier removal. If using parchment, leave some overhang on the sides to create handles.
- In a large mixing bowl, combine the chocolate cake mix, 3 eggs, 1/2 cup vegetable oil, and 1 cup water. Mix according to the package instructions, typically about 2 minutes with an electric mixer on medium speed, until the batter is smooth and well combined. Make sure to scrape down the sides of the bowl to incorporate all the dry ingredients.
- Pour the cake batter into your prepared baking dish, spreading it evenly with a spatula. Bake in the preheated oven for 25-30 minutes, or until a toothpick inserted into the center comes out clean or with just a few moist crumbs. Don’t overbake, as this can make the cake dry.
- While the cake is baking, make the coconut filling. In a medium bowl, combine the sweetened condensed milk, shredded coconut, and powdered sugar. Stir until thoroughly mixed. The mixture will be thick and sticky – this is perfect as it will create a luscious middle layer in your cake.
- When the cake is done baking, remove it from the oven and place it on a cooling rack. Allow it to cool for about 10 minutes, but add the coconut filling while the cake is still warm. This helps the filling to slightly melt into the top of the cake. Carefully spread the coconut mixture evenly over the warm cake, going all the way to the edges.
- For the chocolate ganache, pour the heavy cream into a medium saucepan and heat over medium heat. Watch it carefully and remove from heat just as it begins to simmer – you’ll see small bubbles forming around the edges. Do not let it come to a full boil. Immediately pour the hot cream over the chocolate chips in a heatproof bowl. Let it sit undisturbed for 1-2 minutes to allow the chocolate to begin melting, then stir gently with a whisk until smooth and glossy. Stir in the vanilla extract at the end for flavor.
- While the ganache is still warm and pourable, slowly pour it over the coconut layer, covering it completely. Use an offset spatula or the back of a spoon to spread it evenly, working quickly before the ganache starts to set. If desired, sprinkle additional coconut or chocolate shavings on top for decoration.
- Refrigerate the cake for at least 1 hour, or until the chocolate layer is completely set. This chilling time allows all the layers to meld together beautifully and makes the cake easier to slice cleanly. Cut into squares and serve chilled or at room temperature. Store any leftovers covered in the refrigerator for up to 5 days.
Tips & Variations
- For a dairy-free version, substitute the buttermilk with a mixture of dairy-free milk and 1 tablespoon of vinegar.
- Add ½ teaspoon of coconut extract to the cake batter for an even more pronounced coconut flavor.
- If you prefer a layer cake, double the recipe and bake in two round pans.
- For a mocha twist, add 1 tablespoon of instant espresso powder to the dry ingredients.
- Refrigerate the mixing bowl for the coconut cream for 10 minutes before whipping for better results.
- Garnish with fresh berries for a pop of color and complementary flavor.
Serving Suggestions
This Choco Coconut Dream Cake pairs beautifully with a scoop of vanilla ice cream or a dollop of whipped cream for an extra indulgent dessert experience. For a complete tropical theme, serve alongside fresh mango slices or pineapple chunks.
For beverages, consider serving with a cup of rich, dark coffee to balance the sweetness, or a chilled coconut rum cocktail for an adult dinner party.
Notes
- Store leftovers covered in the refrigerator for up to 4 days.
- The cake can be frozen without the coconut cream topping for up to 2 months.
- For best flavor, allow the cake to come to room temperature for about 20 minutes before serving if refrigerated.
- The cake is done when it springs back lightly when touched in the center.
FAQs
Can I use coconut cream instead of coconut milk?
Yes, you can use canned coconut cream directly instead of separating the cream from coconut milk, which will save you a step.
My coconut milk didn’t separate in the refrigerator. What should I do?
Some brands don’t separate well. In this case, you can use the coconut milk as is and add 1-2 tablespoons of cornstarch while whipping to help it thicken.
Can I make this cake gluten-free?
Absolutely! Simply substitute the all-purpose flour with a 1:1 gluten-free baking flour blend.
How do I know when my shredded coconut is properly toasted?
The coconut should be a light golden brown and fragrant. Watch it carefully as it can burn quickly.
[recipe_card]