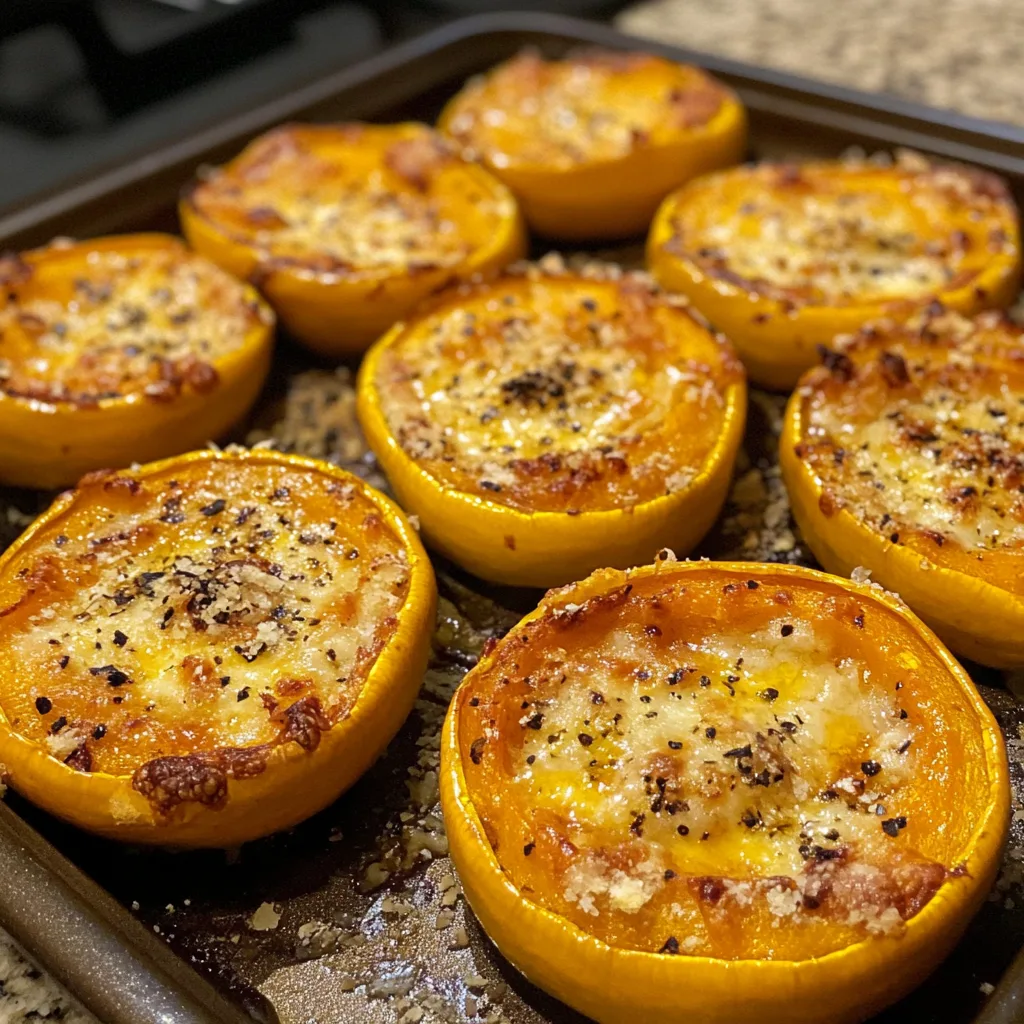
There’s something irresistibly comforting about vegetables transformed by a golden, cheesy crust. These Cheesy Baked Squash Rounds take humble yellow squash and elevate it into a dish that even vegetable skeptics will eagerly devour. The combination of tender squash with the savory crunch of seasoned breadcrumbs and melted cheese creates the perfect side dish for any meal.
Ready in just 45 minutes, this recipe strikes the perfect balance between wholesome and indulgent. It’s one of those versatile dishes that works equally well for a casual weeknight dinner or as part of a more elaborate weekend spread. The best part? It’s incredibly simple to prepare, letting the oven do most of the work while you attend to other dishes.
Why You’ll Love This
- Simple ingredients that are easy to find year-round
- Kid-friendly way to serve vegetables (the cheese helps win them over!)
- Can be prepped ahead and baked just before serving
- Versatile side dish that pairs with almost any protein
- Leftovers reheat beautifully for lunch the next day
Ingredients
- 2 medium yellow squash, sliced into 1/4-inch rounds
- 1 cup shredded cheddar cheese
- 1/4 cup grated Parmesan cheese
- 1/4 cup breadcrumbs
- 2 tablespoons olive oil
- 1 teaspoon dried oregano
- 1 teaspoon dried basil
- Salt and pepper to taste
Instructions
- Set oven to 375°F (190°C) and line a baking sheet with parchment paper
- In a bowl, mix breadcrumbs, Parmesan cheese, oregano, basil, salt and pepper
- Brush both sides of each squash round with olive oil, then coat with the breadcrumb mixture
- Place coated squash rounds on the baking sheet without touching. Sprinkle shredded cheddar evenly over the top
- Cook for 20-25 minutes until the cheese is melted, golden, and bubbly
- Let rest for a few minutes before serving warm
Tips & Variations
- Swap yellow squash for zucchini or use a combination of both for variety in color and flavor.
- For a spicy kick, add a pinch of red pepper flakes to the seasoning mix.
- Make it gluten-free by using gluten-free breadcrumbs or crushed rice cereal.
- Try different cheese combinations – mozzarella, pepper jack, or smoked gouda all work beautifully.
- For extra flavor, add a tablespoon of ranch seasoning to the breadcrumb mixture.
- If the breadcrumbs aren’t browning enough, switch to the broiler for the final 1-2 minutes (watch carefully to prevent burning).
Serving Suggestions
These Cheesy Baked Squash Rounds make a perfect side dish for grilled or roasted meats. Try them alongside a juicy grilled chicken breast or a perfectly seared steak. They also pair wonderfully with simple pasta dishes or a hearty grain bowl.
For a complete vegetarian meal, serve these rounds with a fresh green salad and some crusty bread. A dollop of marinara sauce on the side creates a delicious dipping option that transforms this side into a satisfying appetizer.
Notes
- Store leftovers in an airtight container in the refrigerator for up to 3 days.
- Reheat in a 350°F oven for 5-10 minutes to maintain crispness (microwaving will make them soggy).
- Look for squash that’s firm with bright, unblemished skin for the best texture and flavor.
- Slicing the squash to an even thickness ensures they cook at the same rate.
FAQs
Can I prepare these ahead of time?
Yes! You can slice and season the squash up to a day ahead. Store in the refrigerator, then bake and add the cheese and breadcrumb topping just before serving.
Why is my squash watery?
Squash naturally contains a lot of water. For less moisture, you can salt the slices and let them sit for 15 minutes, then pat dry before seasoning and baking.
Can I freeze these squash rounds?
While technically possible, freezing isn’t recommended as the texture becomes very soft upon thawing. These are best enjoyed fresh.
How do I know when the squash is perfectly done?
The squash should be tender when pierced with a fork, but not mushy. The cheese should be melted and the breadcrumbs golden brown.
[recipe_card]